
**Title: Metal Etching Magic: Your Vinyl Overlay Adventure Starts Here!**
(How To Etch Metal Name Plate With Vinyl Overlay)
**What is Vinyl Overlay Etching?**
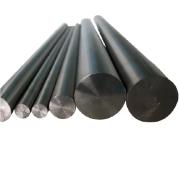
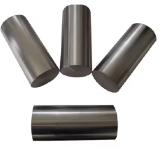
Vinyl overlay etching is a clever DIY method. You use adhesive vinyl as a protective mask. This mask shields parts of a metal plate. You then apply a chemical etching solution. The solution eats away at the exposed metal areas. The vinyl-covered parts stay untouched. This creates a permanent, recessed design or text. Think of the vinyl as a super-sticky stencil. It controls exactly where the etching happens. This technique works great on soft metals. Brass, copper, and aluminum are perfect candidates. You need basic tools: vinyl, a cutter, transfer tape, etching chemical, and metal. The result is a professional-looking etched plate. It’s ideal for nameplates, labels, and decorative items. The vinyl overlay makes intricate designs possible. It’s far more precise than freehand methods.
**Why Choose Vinyl Overlay for Metal Etching?**
Vinyl overlay etching offers several big advantages. First, it’s incredibly cost-effective. You avoid expensive engraving machines or services. Basic supplies are affordable and easy to find. Second, it allows for amazing precision and detail. A vinyl cutter handles complex fonts and graphics perfectly. Third, it’s surprisingly accessible. You don’t need advanced metalworking skills. Patience and care matter more than years of experience. Fourth, the results are durable and professional. The etched recess won’t fade or wear off like paint. It becomes part of the metal itself. Fifth, it offers great creative freedom. Design anything you can imagine on your computer. Then cut it precisely in vinyl. Finally, the process is relatively safe. You work with chemicals, but careful handling minimizes risk. Vinyl overlay makes professional etching achievable at home.
**How to Etch Metal Using a Vinyl Overlay: A Step-by-Step Guide**
Ready to make your own etched metal nameplate? Grab these supplies: metal plate (brass, aluminum, copper), adhesive vinyl, transfer tape, vinyl cutter or craft knife, etching solution (ferric chloride for copper/brass, specific others for aluminum), plastic container, plastic tweezers, gloves, safety glasses, dish soap, baking soda, isopropyl alcohol, paper towels, and a scrub brush. Follow these steps carefully:
1. **Design & Cut:** Create your nameplate design on your computer. Mirror the design horizontally. This is crucial because you apply the vinyl face down. Load vinyl into your cutter. Cut the mirrored design. Weed away the excess vinyl around your design and *inside* any letters (like ‘O’, ‘A’, ‘D’). Only the parts you want *raised* (un-etched) should have vinyl covering them. The background and letter interiors should be cut out and removed.
2. **Prepare the Metal:** Clean the metal plate thoroughly. Use dish soap and water. Scrub it well. Rinse and dry completely. Wipe the surface with isopropyl alcohol. This removes any oils or residue. Handle the metal by the edges only. Fingerprints can interfere with etching.
3. **Apply the Vinyl Mask:** Cut a piece of transfer tape larger than your design. Peel the backing off your cut vinyl. Carefully apply the transfer tape over the vinyl design. Rub firmly to ensure good adhesion. Peel the vinyl backing away. The design should now stick to the transfer tape. Align the design perfectly on your clean metal plate. Rub the transfer tape vigorously. Use a scraper tool or old credit card. Ensure every bit of vinyl sticks tightly to the metal, especially the edges. Slowly peel away the transfer tape. Your vinyl stencil is now on the metal. Check for any tiny air bubbles or lifted edges. Press them down firmly. **Pro Tip:** Lightly heat the applied vinyl with a hairdryer. This “bakes” the adhesive for a super-strong seal against the etchant.
4. **Apply Etchant:** Put on your gloves and safety glasses. Work in a well-ventilated area. Pour enough etching solution into the plastic container. It should cover your plate. Carefully place your metal plate into the solution, design side up. Use plastic tweezers. Agitate the container gently. Rock it back and forth. This keeps fresh etchant flowing over the metal. Check the progress every 5-10 minutes. Etching times vary. It depends on the metal, etchant strength, and desired depth. Aluminum etches faster than brass. Stop when the etch looks deep enough.
5. **Neutralize & Clean:** Once etched, remove the plate with plastic tweezers. Rinse it immediately under running water. This stops the etching action. Prepare a baking soda solution (a few tablespoons in water). Submerge the plate to neutralize any remaining acid. Rinse thoroughly again. Peel off the vinyl overlay. It might be stained, but it should come off. Scrub the plate gently with dish soap and a soft brush. Remove all residue. Dry the plate completely.
6. **Finishing Touches (Optional):** Your etched plate is now functional. You can leave it as-is for a raw metal look. Apply a clear lacquer to prevent tarnishing. Rub dark paint or wax into the etched recesses. Wipe the surface clean. This makes the design stand out dramatically against the shiny metal background.
**Vinyl Overlay Etching Applications: Beyond Nameplates**
Vinyl overlay etching is incredibly versatile. Don’t limit yourself to just nameplates! The technique shines for many personalized and functional items. Create unique pet ID tags from aluminum. They are lightweight and durable. Etch custom labels for toolboxes or workshop cabinets. Brass plates add a classic touch. Make distinctive house numbers or mailbox plaques. Etched copper makes beautiful decorative art pieces. Try coasters or jewelry pendants. Personalize gifts like keychains, bottle openers, or guitar pickguards. Etch serial numbers or logos onto equipment. The method works for awards, plaques, and memorial plates. Anywhere you need permanent, custom marking on metal, vinyl overlay etching is a fantastic option. Its ability to handle fine detail makes it suitable for intricate artwork and small text alike.
**Vinyl Overlay Etching FAQs**
1. **Is ferric chloride the only etchant I can use?** No. Ferric chloride works well for copper and brass. For aluminum, ammonium persulfate or a specific aluminum etchant is better. Always check the etchant is suitable for your metal. Follow the manufacturer’s safety instructions exactly.
2. **Can I use any type of vinyl?** Permanent adhesive vinyl is best. Oracal 651 or Siser EasyWeed are popular choices. Avoid vinyl with weak adhesive. It might peel during etching. Cheap vinyl might not resist the chemical long enough. Good quality vinyl forms a strong seal.
3. **My etchant isn’t working well. What’s wrong?** Check the metal surface prep. Oils or fingerprints prevent etching. Ensure the vinyl is sealed perfectly. No gaps at the edges. The etchant might be old or exhausted. Fresh solution works best. Temperature matters. Warmer solutions etch faster than cold ones.
4. **How do I fix bubbles or vinyl lifting during etching?** Prevention is key. Clean the metal perfectly. Apply the vinyl meticulously. Bake it lightly with a hairdryer before etching. If you notice lifting *during* etching, remove the plate immediately. Rinse it. Dry it completely. Carefully press down the lifted vinyl. Seal the edge with clear nail polish if needed. This creates a barrier. Then return it to the etchant. This isn’t always perfect, but it can salvage a piece.
(How To Etch Metal Name Plate With Vinyl Overlay)
5. **Can I etch stainless steel with vinyl overlay?** Etching stainless steel is much harder. It requires stronger acids like nitric acid or specialized mixtures. These are more hazardous and harder to handle safely. The process is less predictable for beginners. Brass, copper, and aluminum are much more DIY-friendly. Stick with those metals initially.
Inquiry us
if you want to want to know more, please feel free to contact us.