
1. Introduction
In the past 48 hours, architects and builders across North America have been buzzing about the surge in demand for sustainable, low-maintenance exteriors—especially metal clad walls made from materials like corten steel, zinc, and aluminum. With rising interest in net-zero buildings and resilient design, metal cladding has moved from industrial applications to mainstream residential use. If you’re considering a metal clad house or upgrading your metal clad building, this guide will walk you through everything you need to know—from choosing the right clad metals to installing and maintaining them properly.
Whether you’re drawn to the rustic charm of a corten steel facade, the sleek minimalism of a standing seam siding system, or the durability of a corrugated steel facade, understanding the basics of metal clad installation is key to avoiding costly mistakes.
2. Understanding Metal Clad Meaning and Materials
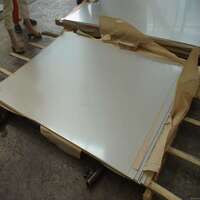
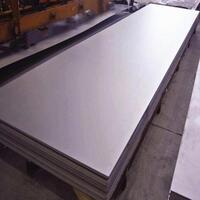
Before diving into installation, it’s important to clarify what ‘metal clad‘ actually means. The term ‘clad metal meaning’ refers to a composite material where one metal is bonded to another—often for enhanced corrosion resistance, strength, or aesthetics. Common examples include aluminum clad steel, stainless clad aluminum, and copper nickel clad. In construction, ‘metal clad’ typically describes exterior panels or sheets used as siding, roofing, or facades.
Popular options include:
- Corten steel siding (known for its weathering rust patina)
- Zinc metal siding (low maintenance, self-healing surface)
- Copper siding (elegant, ages to green patina)
- Colorbond standing seam or PAC CLAD standing seam roof systems
- Exterior corrugated metal siding for sheds or modern homes
Each material offers unique benefits, so choose based on climate, budget, and design goals. For instance, corten siding cost can be higher upfront but requires zero painting, while aluminum clad sheet is lightweight and ideal for coastal areas.
3. Preparing for Installation
Proper prep prevents 90% of long-term problems with metal clad walls. Start by checking local building codes—some jurisdictions have specific requirements for fire resistance, wind load, or thermal performance, especially when using metal clad electrical wire nearby or insulating with aluminum clad pipe insulation.
Gather these essentials:
- Substrate: Plywood or OSB sheathing with a proper weather-resistant barrier (like housewrap)
- Furring strips: To create an air gap behind the cladding (critical for drainage and drying)
- Fasteners: Stainless steel or coated screws rated for your specific metal (e.g., avoid carbon steel fasteners with aluminum or zinc)
- Tools: Metal snips, drill, laser level, tape measure, safety gear
Always acclimate your metal panels on-site for 24–48 hours before installation to minimize expansion/contraction issues.
4. Step-by-Step Installation Guide
Follow these steps for a professional-looking metal clad wall:
4.1. Install the Weather Barrier and Furring Strips
Wrap the wall with a high-quality rainscreen membrane. Then attach vertical furring strips (typically 1×3 wood or aluminum) spaced 16–24 inches apart. This cavity allows airflow behind the metal, preventing moisture buildup—a must for any metal clad building in humid climates.
4.2. Start at the Bottom with a Starter Strip
For vertical standing seam metal siding or corrugated panels, begin at the bottom corner. Use a level to ensure your first panel is perfectly plumb. Many systems, like PAC CLAD HWP or PAC CLAD column covers, include integrated starter components.
4.3. Secure Panels with Proper Fastening
Never over-tighten screws. Use neoprene-washed fasteners designed for metal cladding. For standing seam systems, clips are often hidden to allow thermal movement. With exterior corrugated metal siding, fasten at the crest of each wave—not the trough—to avoid water pooling.
4.4. Handle Joints and Penetrations Carefully
Overlap panels per manufacturer specs (usually 1–2 inches). Flash windows, doors, and roof intersections with compatible metal—like PAC CLAD coping for parapets. Seal penetrations with UV-stable sealant rated for metal.
5. Maintenance and Troubleshooting
Metal clad walls are low-maintenance but not zero-maintenance. Here’s how to keep them looking great:
- Rinse annually with water to remove salt, pollen, or debris (especially important for zinc clad dormer or coastal installations).
- Inspect fasteners every 2–3 years; replace any showing signs of corrosion.
- For corten steel siding, avoid runoff onto concrete or light-colored stone—it can stain due to rust leaching.
- If scratches appear on aluminum clad steel or stainless plate surfaces, touch up with matching paint or let natural patina develop.
Common problems—and fixes:
- Oil-canning (waviness in large panels): Caused by improper support spacing. Add intermediate furring strips if needed.
- Galvanic corrosion: Occurs when dissimilar metals touch (e.g., copper near aluminum). Always use isolation barriers.
- Fading or chalking: Usually affects painted systems like Colorbond. Choose PVDF-coated products for better longevity.
6. Conclusion
Installing a metal clad wall is a smart investment in durability, style, and sustainability. Whether you opt for a rugged corten steel plate facade, a sleek zinc clad roof extension, or classic standing seam siding, following best practices ensures decades of performance. Remember: the key to success lies in proper substrate prep, correct fastening, and routine checks. With the right approach, your metal clad house or shed won’t just stand out—it’ll stand the test of time.
Our Website founded on October 17, 2012, is a high-tech enterprise committed to the research and development, production, processing, sales and technical services of ceramic relative materials such as How. Our products includes but not limited to Boron Carbide Ceramic Products, Boron Nitride Ceramic Products, Silicon Carbide Ceramic Products, Silicon Nitride Ceramic Products, Zirconium Dioxide Ceramic Products, etc. If you are interested, please feel free to contact us.